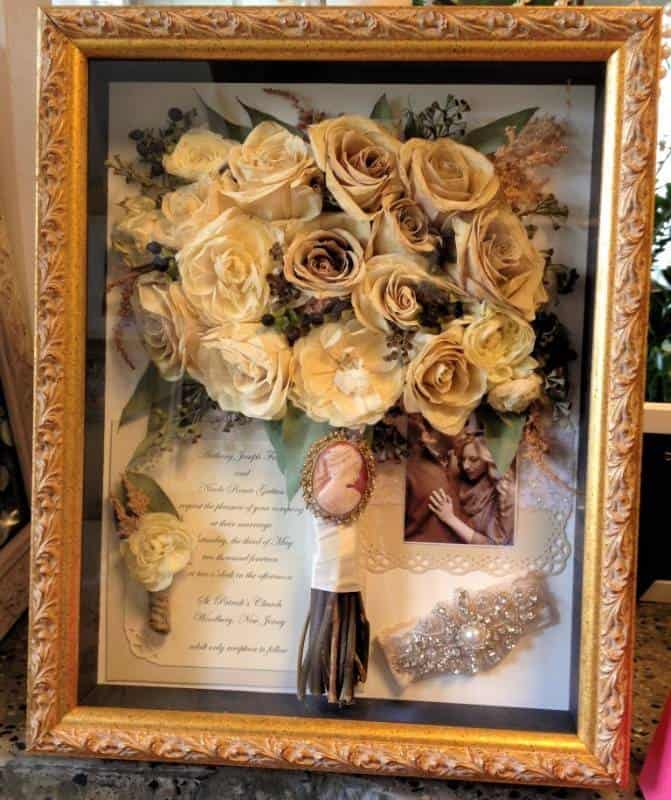
In times past, most brides tossed their beloved bouquets away to waiting bridesmaids, but these days, brides are much more likely to toss a “throw bouquet,” and keep their own. This precious memento is a wonderful reminder of your special day, and there are a variety of ways to preserve it. Below are the instructions to create a gorgeous wedding flowers shadowbox so you can display your bouquet for many years to come.
leighflorist.net
What You’ll Need:
- 1 Glass-Enclosed Shadowbox (at least 8×10 in size)
- Large Container Silica Gel Pellets
- Large Bowl
- Hot Glue Gun
- Decorative Paper (for background, if desired)
Steps:
Step 1: The first step is to pick and buy your flowers. I picked Sunflowers for this tutorial. We love FloraQueen’s sunflowers. They are fresh, radiant and they are absolutely gorgeous! If you want to pick a different type of flower, feel free to browse their wedding flowers collection.
Step 2: Next you’ll want to prepare your flowers by drying them. Two methods for drying flowers are popular, you can either use silica gel which is great if you want the flowers to keep their radiant color. Start by cutting the stems and leaves from the flowers, leaving only about a centimeter of stem at the bottom of the flower. Ensure that your bowl is large enough to fit all of the flowers, with enough room so that no flower is touching another. You may need to use more than one bowl for this process. Place your flowers in the bowl, with the stem side facing down.
Another method is simply by just drying them out in your closet on a shelf, which is what I did for this tutorial!.
Step 3: Next, gently pour your silica gel over the flowers, making sure you cover each one. Every flower in the bowl should have at least a small layer of silica gel completely covering it. Allow your flowers to stay like this overnight; place a lid over the bowl and create a small, 1/4 inch opening to enable air to move through the bowl.
Step 4: Now, take your flowers from the bowl and gently shake them to ensure that all of the silica gel falls away from the petals. Cover your silica gel in an airtight container for future use.

forever-flowers.com
Step 5: Next, you’re going to place the flowers in the shadowbox (add your decorative paper to the back of the shadowbox first if desired) using the hot glue gun. Whether you’re going to fill the entire box or create a shape with the flowers, it’s important to line everything up before actually gluing.
Step 6: Now, hot glue the bottom of each rose to the back of the shadowbox, in whatever shape you prefer. Once this is finished, place the glass back on the shadowbox and you’re ready for display.
As you can see, this is a fairly easy process and a wonderful way to preserve and display your wedding bouquet.
The post Wedding Flowers Shadowbox DIY appeared first on Inspired Bride.


